
You’ve just invested in the bleeding edge of storage technology: a PCIe 5.0 NVMe SSD. The promise was intoxicating – 12,000, even 14,500 MB/s sequential reads and writes, a quantum leap that would obliterate bottlenecks in your most demanding workflows. You pictured instantaneous game loads, seamless 8K video editing, and data transfers that felt like magic. But then, you started pushing it. A large file transfer, a sustained rendering job, or compiling a massive dataset, and suddenly, that dream machine felt… sluggish. Slower, in fact, than your old PCIe 3.0 drive. The benchmarks lied, or so it seemed. You’re not alone in this frustration; it’s a common, deeply irritating reality for many early adopters. That high-performance drive, the one you paid a premium for, is likely choking itself into submission, silently throttling its performance to a crawl to prevent overheating. It’s a costly trap, turning innovation into exasperation, and it’s precisely what we’re going to solve today.
To unlock and sustain peak PCIe 5.0 SSD performance, an active heatsink solution featuring a dedicated micro-fan is essential. Passive motherboard heatsinks are insufficient for the 11-14.5W thermal load of Gen 5.0 controllers, leading to severe throttling from 14 GB/s down to 1.5 GB/s within seconds. Proper thermal pad selection and BIOS fan curve integration are critical for optimal, sustained operation below 65°C.
Why Your Blazing-Fast PCIe 5.0 SSD Suddenly Feels Slower Than a USB Stick
Let’s pull back the curtain on what’s really happening inside your system. The core of the PCIe 5.0 thermal throttling problem lies in a fundamental thermodynamic challenge: immense power concentrated in an incredibly small area. Modern PCIe 5.0 NVMe controllers, like the Phison E26, are marvels of engineering, capable of processing data at unprecedented speeds. But this processing power comes at a cost – heat. During sustained sequential write operations, these controllers can consume between 11W and 14.5W of power. Now, imagine trying to dissipate that much heat from a silicon package that’s barely 12mm by 12mm. It’s like trying to cool a miniature stovetop burner with a single ice cube.
The physics here are unforgiving. While NAND flash memory cells actually perform optimally when slightly warm, typically in the range of 40°C to 55°C, the controller silicon itself is far more sensitive. Its junction temperature, the critical point where performance is measured, rapidly climbs under load. Once this temperature hits 80°C to 85°C, the controller’s firmware initiates aggressive thermal throttling. This isn’t a gentle slowdown; it’s a dramatic collapse. Those advertised 14 GB/s read/write speeds can plummet to a dismal 1.5 GB/s – slower than many high-end PCIe 3.0 drives, and sometimes even slower than a well-optimized SATA SSD. The worst part? This catastrophic performance drop can occur within a mere 30 to 45 seconds of sustained heavy load. You’re left with a premium component performing like a budget relic, all because of inadequate heat dissipation.
Many users, understandably, assume their motherboard’s integrated passive heatsink will be sufficient. After all, it worked for PCIe 4.0, right? This is where the “costly trap” truly lies. Motherboard integrated heatsinks, while often aesthetically pleasing, are typically designed with limited surface area and low thermal mass. They can absorb a burst of heat, but under the continuous, intense thermal output of a PCIe 5.0 controller, they quickly reach thermal saturation. Once saturated, they can no longer effectively transfer heat away, and the controller’s temperature skyrockets, triggering the throttling mechanism. It’s a fundamental mismatch between the demands of Gen 5.0 silicon and the capabilities of standard passive cooling solutions.
Unpacking the Hidden Costs of Thermal Throttling: Beyond Just Slow Speeds
The immediate and most obvious cost of thermal throttling is the loss of performance. You paid for speed, and you’re not getting it. This translates directly into lost productivity for professionals, longer compile times for developers, frustrating delays for content creators, and a generally diminished user experience for everyone. But the implications extend far beyond mere inconvenience. There are several hidden costs that often go unconsidered:
- Premature Drive Wear: While SSDs are generally robust, operating consistently at the upper limits of their thermal envelope can accelerate component degradation. Extreme temperature fluctuations, especially rapid heating and cooling cycles due to throttling, can stress solder joints and silicon, potentially shortening the lifespan of your expensive drive.
- Data Integrity Risks (Indirect): While modern SSDs have robust error correction, a controller under extreme thermal stress might not operate with the same stability as one running within optimal temperature ranges. While direct data corruption due to heat is rare, an unstable controller is never ideal for critical data.
- System Instability: In extreme cases, a severely overheating SSD controller can contribute to overall system instability, leading to crashes, freezes, or unexpected reboots. This is particularly true in compact systems with limited airflow where the SSD’s heat can radiate to other components.
- Wasted Investment: Perhaps the most frustrating hidden cost is the sheer waste of your financial investment. You’ve paid a premium for cutting-edge technology, only to have it perform at a fraction of its potential. It’s like buying a supercar and being forced to drive it in first gear everywhere.
- Diagnostic Headaches: For many users, the initial experience of throttling isn’t immediately identifiable as a thermal issue. They might suspect driver problems, software conflicts, or even a faulty drive, leading to hours of troubleshooting and frustration before the real culprit is identified.
Understanding these broader implications underscores why addressing PCIe 5.0 SSD thermals isn’t just about chasing benchmark numbers; it’s about protecting your investment, ensuring system stability, and maintaining a productive, frustration-free computing experience.
Decoding the Thermal Dissipation Landscape: Passive, Tower, or Active?
When it comes to cooling your high-performance PCIe 5.0 SSD, you’re essentially choosing between three primary approaches, each with its own set of trade-offs. Understanding these nuances is key to making an informed decision that aligns with your performance goals, acoustic preferences, and system constraints.
| Solution Type | Thermal Capacity (Sustained Load) | Acoustic Profile | Installation Complexity | Ideal Use Case |
|---|---|---|---|---|
| Motherboard Integrated Passive Heatsink | Inadequate. Low thermal mass, quickly saturates under 11-14.5W load. Leads to rapid throttling (14GB/s to 1.5GB/s in <45s). | Silent (no moving parts). | Very Low. Often pre-installed or simple screw-down. | Light to moderate workloads, burst transfers only. Not suitable for sustained PCIe 5.0 performance. |
| Dual-Heatpipe Tower Heatsink (e.g., Thermalright HR-09 Pro) | Good. Large aluminum fin stack provides substantial thermal buffering. Can delay throttling significantly, sometimes prevent it in well-ventilated cases. | Silent (no moving parts). | Moderate. Larger footprint, potential clearance issues with GPUs or CPU coolers. | Users prioritizing silence and willing to accept slightly higher temps than active solutions. Systems with excellent case airflow. |
| Micro-Fan Active Heatsink (e.g., 30mm PWM fan) | Excellent. Continuous forced convection maintains controller temps below 65°C even under extreme sustained load. Eliminates throttling. | Potentially audible. Small fans can produce a high-pitch whine, especially at high RPMs. PWM control is crucial. | Moderate. Requires power connection (often to motherboard fan header), careful cable management. Generally compact. | Demanding users requiring absolute peak, sustained PCIe 5.0 performance. Content creators, data analysts, heavy gamers. |
Let’s elaborate on each:
-
Motherboard Integrated Passive Heatsinks: The Illusion of Adequacy
These are the most common and, unfortunately, the least effective for PCIe 5.0. They consist of a metal plate, often aluminum, sometimes with a few fins, designed to sit atop your M.2 drive. Their primary function is to absorb heat and then radiate it into the surrounding case environment. For PCIe 3.0 and even some PCIe 4.0 drives, this was often sufficient for typical workloads. However, the sheer power density of PCIe 5.0 controllers overwhelms these designs. They lack the surface area and thermal mass to effectively dissipate 11-14.5W of continuous heat. The result, as we’ve discussed, is rapid thermal saturation and aggressive throttling. Relying on these for PCIe 5.0 is a costly trap that negates your investment in high-speed storage. -
Dual-Heatpipe Tower Heatsinks: The Silent Heavyweights
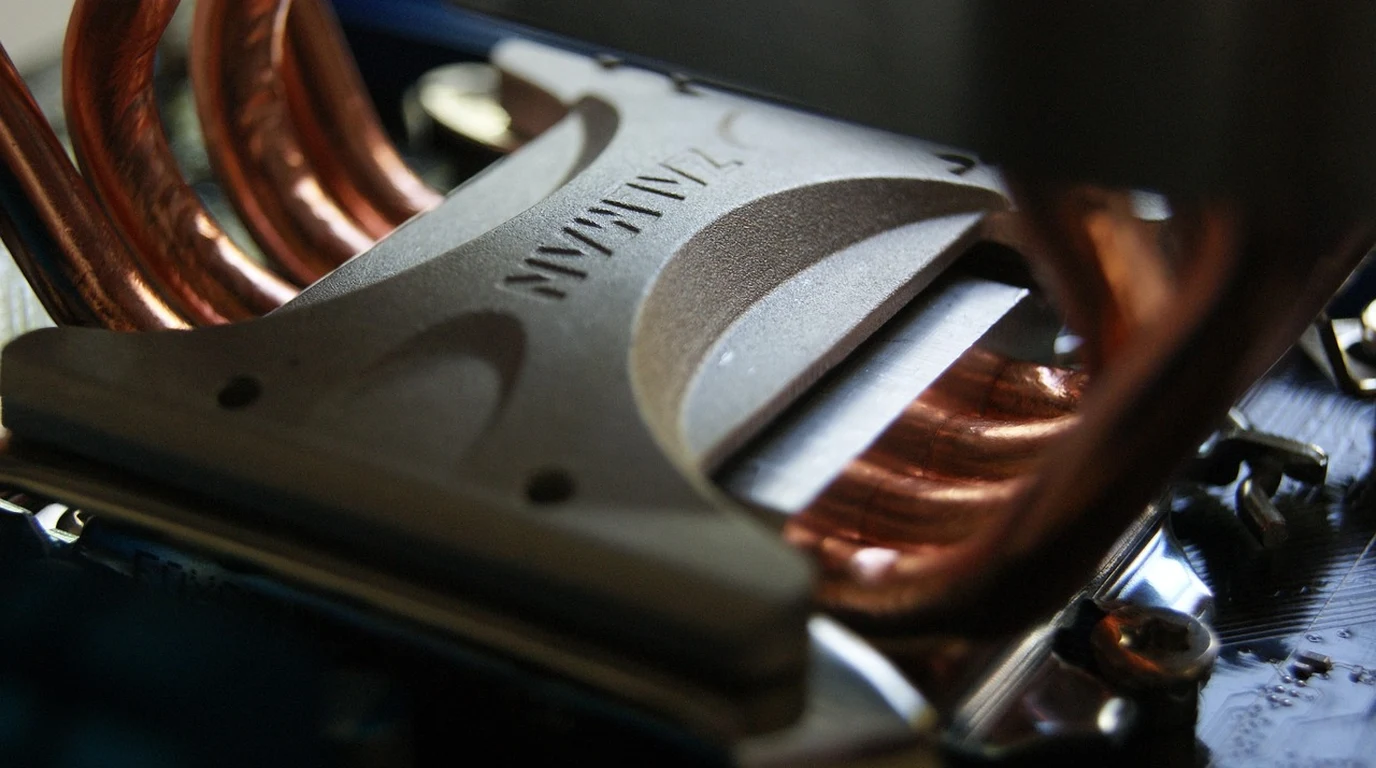
Products like the Thermalright HR-09 Pro represent a significant step up. These are essentially miniature versions of CPU tower coolers, featuring multiple copper heatpipes that draw heat away from the SSD controller and transfer it to a much larger aluminum fin stack. The increased surface area and thermal mass provide substantial thermal buffering, meaning they can absorb and dissipate heat much more effectively over longer periods. In a well-ventilated PC case, these can often keep PCIe 5.0 SSDs from throttling, or at least significantly delay it, even under sustained loads. Their main advantage is their completely silent operation, as they rely purely on passive convection and ambient case airflow. The trade-off is their physical size; they can be quite tall and wide, potentially interfering with large graphics cards, CPU air coolers, or even some motherboard components, especially in compact builds. -
Micro-Fan Active Heatsinks: The Performance Champions
This is where you find the gold standard for PCIe 5.0 thermal management. Active heatsinks incorporate a small, dedicated fan (typically 30mm or 40mm) directly into the heatsink assembly. This fan actively forces air over the heatsink fins, dramatically increasing the rate of heat transfer through forced convection. This continuous airflow ensures that the controller’s temperature remains well below the throttling threshold, often keeping it under 65°C even during the most demanding, sustained operations. The benefit is uncompromising, sustained performance. The primary drawback, however, is acoustics. Small fans, especially when spinning at high RPMs, can produce a distinct, high-pitched whine that some users find irritating. This is why PWM (Pulse Width Modulation) control is absolutely critical, allowing you to fine-tune the fan speed based on temperature and balance performance with noise levels. For anyone demanding the absolute maximum from their PCIe 5.0 SSD, an active solution is the definitive answer.
The Unsung Hero: Why Thermal Pad Selection Isn’t Just an Afterthought
You might think a thermal pad is just a thermal pad, a simple squishy interface. But for PCIe 5.0 SSDs, the humble thermal pad plays a disproportionately critical role in effective heat transfer. Get this wrong, and even the best active heatsink will struggle.
The core function of a thermal pad is to fill microscopic air gaps between the uneven surfaces of the SSD components (controller, NAND chips) and the heatsink. Air is a terrible conductor of heat, so any air pockets act as insulators, severely impeding heat transfer. A high-quality thermal pad, with excellent thermal conductivity (measured in W/mK – Watts per meter-Kelvin), ensures a near-perfect thermal interface.
For PCIe 5.0, you absolutely need a thermal pad with a thermal conductivity rating of at least 10 W/mK, but ideally, you should aim for 12.8 W/mK or higher. Generic, low-quality pads often come in at 3-5 W/mK, which is simply insufficient for the heat density we’re dealing with. Using such a pad is akin to putting a thin blanket between your hot SSD and its cooler – it just won’t work.
Beyond thermal conductivity, two other critical factors are thickness and Shore hardness:
- Thickness: SSDs are not perfectly flat. The controller chip is often slightly taller than the surrounding NAND flash chips. If your thermal pad is too thin, it might only make contact with the tallest component (the controller), leaving air gaps over the NAND chips. If it’s too thick, it might compress excessively, potentially causing uneven pressure or even flexing the PCB of the SSD, which is a definite no-go. You need a pad that is thick enough to conform to the varying heights of the components while still allowing for firm, even pressure from the heatsink. Many active heatsinks come with multiple thickness options (e.g., 0.5mm, 1.0mm, 1.5mm) to accommodate different SSD designs. A good rule of thumb is to start with a thickness that allows for slight compression without excessive force.
- Shore Hardness: This refers to the pad’s compressibility. A pad that is too hard won’t conform well to surface irregularities, leaving those dreaded air gaps. A pad that is too soft might compress too much, losing its structural integrity or squeezing out from under the heatsink over time. You want a pad with a moderate Shore hardness that allows for good conformability under pressure while maintaining its shape and providing consistent contact. This ensures that the heatsink makes full, even contact across the entire surface of the controller and, ideally, the NAND chips as well, maximizing the heat transfer area.
Don’t skimp on thermal pads. They are inexpensive components that can make or break your entire thermal solution. Investing in high-quality pads with the right specifications is a small but crucial step towards unlocking your PCIe 5.0 SSD’s full potential.
Your Step-by-Step Playbook for Taming PCIe 5.0 SSD Thermals Today
Alright, it’s 4:00 PM, and we’re going to get this done. This isn’t just theory; this is your actionable, hands-on guide to ensuring your PCIe 5.0 SSD performs exactly as advertised, without the frustration of thermal throttling. Follow these steps precisely, and you’ll transform your storage experience.
1. Assessment & Preparation: Know Your Battlefield
Before you even open your PC case, gather your intelligence and your tools:
- Identify Your SSD: Note its model number and form factor (usually M.2 2280). Check if it has components on both sides (double-sided), as this can influence thermal pad thickness and heatsink compatibility.
- Motherboard Compatibility: Confirm which M.2 slots on your motherboard support PCIe 5.0. Check your motherboard manual for any specific clearance issues around these slots, especially with your GPU or large CPU coolers.
- Heatsink Selection: Based on our earlier discussion, choose your active heatsink. Ensure it comes with a PWM fan for speed control.
- Thermal Pad Acquisition: Purchase high-quality thermal pads with a thermal conductivity of 12.8 W/mK or higher. Get a variety of thicknesses (e.g., 0.5mm, 1.0mm, 1.5mm) if your heatsink doesn’t include them, or if you’re unsure about your SSD’s component heights.
- Tools: Small Phillips head screwdriver, anti-static wrist strap (recommended), isopropyl alcohol, lint-free wipes, and a flashlight.
- Backup: While unlikely to cause data loss, it’s always wise to back up critical data before any hardware modification.
2. BIOS Configuration: Setting the Stage for Speed
This step is often overlooked but crucial for optimal performance and fan control.
- PCIe Slot Bifurcation (if applicable): Some motherboards require you to manually set the PCIe generation for specific M.2 slots or even bifurcate PCIe lanes if you’re using multiple high-speed devices. Consult your motherboard manual for the “PCIe Configuration,” “M.2 Slot Settings,” or “NVMe Configuration” sections. Ensure your PCIe 5.0 slot is explicitly set to “Gen 5” or “Auto” (and verifies Gen 5 operation later).
- Fan Curve Integration (for active heatsinks): Locate your motherboard’s “Fan Control” or “Q-Fan Control” section in the BIOS. Identify the fan header you’ll connect your SSD heatsink fan to (often a CPU_FAN, CHA_FAN, or AIO_PUMP header). Set up a custom fan curve:
- Start with a low RPM (e.g., 20-30%) at idle temperatures (30-40°C) for quiet operation.
- Ramp up the fan speed progressively as the temperature increases (e.g., 50% at 50°C, 75% at 60°C, 100% at 70°C).
- Crucially, ensure the fan curve is tied to the M.2 SSD temperature sensor if your motherboard supports it. If not, link it to a nearby PCH or CPU package temperature, understanding it might not be as precise.
- Save and Exit: Apply your BIOS changes.
3. Thermal Pad Precision: The Critical Interface
This is where attention to detail pays off. Incorrect pad application can negate the benefits of your heatsink.
- Clean Surfaces: Carefully remove any existing thermal pads or films from your SSD and the heatsink. Use isopropyl alcohol and a lint-free wipe to ensure both surfaces are perfectly clean and free of dust or oils.
- Measure & Cut: Determine the appropriate thermal pad thickness. If your SSD has a controller that’s slightly taller than the NAND chips, you might need a thicker pad over the controller and potentially thinner ones over the NAND, or a single pad that compresses well to both. Cut the thermal pad(s) to cover the controller chip and, ideally, the NAND flash chips if they are also making contact with the heatsink.
- Apply with Care: Gently peel off the protective films from both sides of the thermal pad. Place the pad squarely over the components, ensuring full coverage without overlap onto other small surface-mount components. Avoid touching the pad’s surface with your fingers to prevent oil transfer.
4. Heatsink Installation: Secure and Aligned
Install your chosen heatsink according to its manufacturer’s instructions.
- Mount the SSD: Insert your PCIe 5.0 SSD into the correct M.2 slot on your motherboard and secure it with the standoff screw or latch.
- Mount the Heatsink: Carefully align the heatsink over the SSD, ensuring the thermal pad makes full contact. Apply even, gentle pressure as you secure the heatsink with its mounting screws or clips. Avoid overtightening, which can flex the PCB.
- Connect the Fan (for active solutions): Plug the micro-fan’s PWM cable into the designated fan header on your motherboard (the one you configured in BIOS). Route the cable neatly to avoid interference with other components or airflow. Ensure the fan is oriented to blow air across the fins, typically upwards or towards the rear exhaust fan.
5. Initial Power-On & Monitoring: Trust, But Verify
Time to see if our efforts paid off.
- First Boot: Power on your system. Enter the BIOS again to confirm the fan is spinning and responding to your configured fan curve.
- Install Monitoring Software: Once in Windows (or your OS), install monitoring tools like HWiNFO64 or CrystalDiskInfo. These will allow you to see your SSD’s temperature in real-time. Pay close attention to the “Controller Temperature” (often labeled “Drive Temperature 2” or similar).
- Idle Temps: Note your SSD’s idle temperature. It should be comfortably in the 30-45°C range.
6. Benchmark Verification: The Proof is in the Performance
This is the moment of truth. We need to confirm sustained performance.
- Download CrystalDiskMark: This is an industry-standard benchmarking tool.
- Run Sustained Sequential Write Test: Configure CrystalDiskMark to run a large sequential write test (e.g., 32GB or 64GB test size, 5 passes). This will simulate the heavy, sustained load that previously triggered throttling.
- Monitor Temperatures: While the benchmark is running, keep HWiNFO64 or CrystalDiskInfo open and monitor the controller temperature.
- Analyze Results:
- Temperature: Your controller temperature should remain well below the 80-85°C throttling threshold, ideally staying under 65-70°C. If it’s still climbing rapidly, re-check thermal pad contact and heatsink installation.
- Performance: Your sequential write speeds should remain consistently high throughout the entire benchmark, reflecting the advertised speeds of your PCIe 5.0 drive (e.g., 12,000-14,500 MB/s). If you see a dramatic drop-off after 30-60 seconds, your cooling solution is still inadequate, or the thermal interface needs adjustment.
7. Long-Term Monitoring & Adjustment: Fine-Tuning Your Setup
Your work isn’t quite done. Periodically check your SSD temperatures during your typical heavy workloads. If you find the fan noise too intrusive, you can return to the BIOS and fine-tune your fan curve, perhaps sacrificing a few degrees for quieter operation, as long as you stay well clear of the throttling point. Conversely, if you’re still seeing higher-than-desired temperatures, you might need to increase fan speeds or re-evaluate your case airflow. This iterative process ensures you achieve the perfect balance of performance, thermals, and acoustics for your specific system.
By following this playbook, you’ve not only solved the frustrating problem of PCIe 5.0 thermal throttling but also gained a deeper understanding of the critical interplay between power, heat, and performance in modern high-speed storage. Enjoy your truly blazing-fast SSD!
Frequently Asked Questions
Do I really need an active heatsink for my PCIe 5.0 SSD, or is a good passive one enough?
For sustained peak performance, an active heatsink with a dedicated micro-fan is almost always necessary for PCIe 5.0 SSDs. The 11-14.5W thermal output of Gen 5.0 controllers overwhelms even large passive heatsinks, leading to rapid thermal saturation and severe throttling within seconds. While large tower-style passive heatsinks offer better buffering than motherboard-integrated ones, only active cooling provides the continuous forced convection needed to maintain controller temperatures consistently below 65°C under heavy load.